
/BACK
This article will walk you through the process of integrating Qlik Sense with the JsSIP library. This library allows you to make SIP phone calls directly from your browser.
In this section, we'll go through the fundamentals of building an extension from the ground up.
Algorithm of actions:
Extensions are developed through the «dev-hub».
- Creating the extension «caller_extension»
Extensions are developed through the «dev-hub».

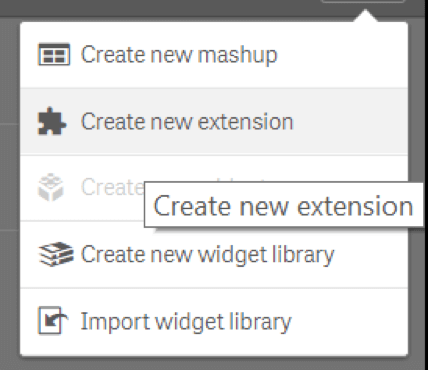
To create extensions, go to the top right corner and click the "+" symbol, then pick «Create new extension»:
After clicking, you must input a name for the extension and choose a template from which it will be built:

The following is an example of a simple template, which contains nothing but source files:
Learn more about these files:
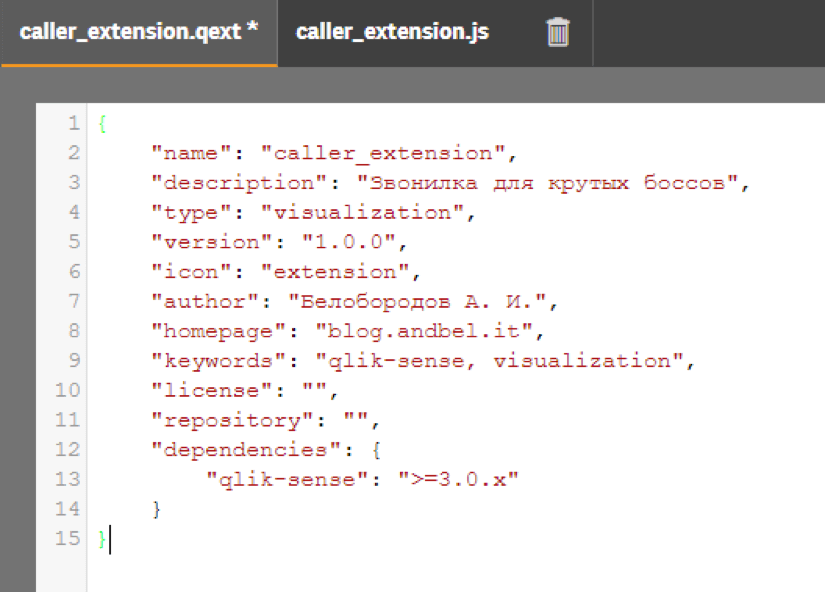
The «caller_extension.qext» file
- The file «caller_extension.qext» contains meta data of the extension: name, version, description, etc.
- The file «caller_extension.js» contains the JS code, which is activated by default when an extension is added to the page.
Learn more about these files:
The «caller_extension.qext» file
As previously stated, this file provides our extension's meta data. The name, description, picture, kind of extensions, and version of the click for compatibility can all be specified here.
The «caller_extension.js» file
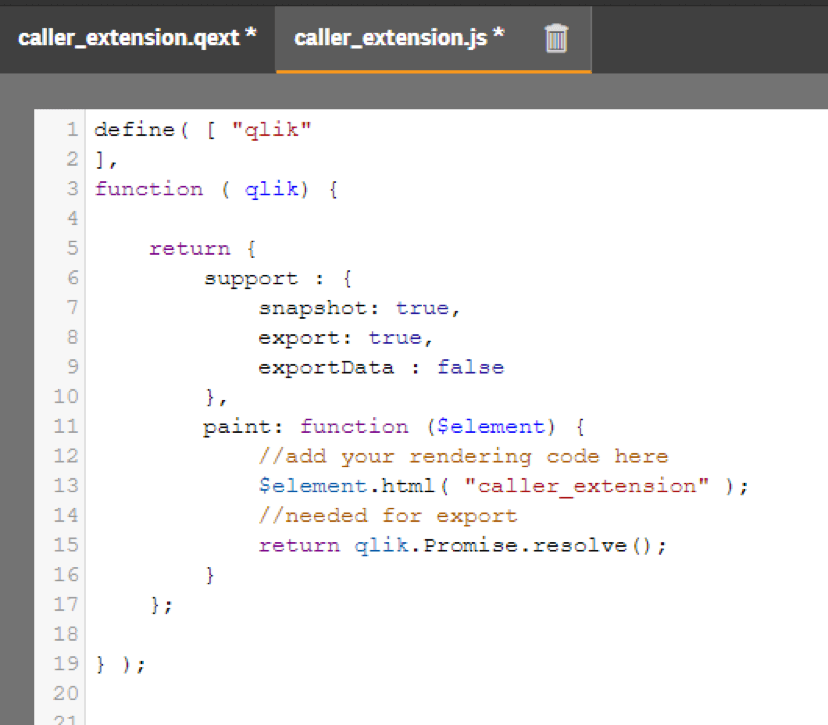
When the extension is added, the code from this file is automatically put to the page. You may use this file to register the addition of all the essential HTML, CSS, and JS files for our extension.
The library require.js is used for this. We may use it to load a certain file and then write it to a variable. Then, if the variable is HTML or CSS code, we may place it wherever on the page or refer to it as an object (if it is JS).
This method allows you to rule out scenarios when your JS code that uses a certain library starts running before the library was included, resulting in issues.
Adding the necessary project files (HTML, CSS)
Now let's look at the process of creating HTML and CSS files, and then adding them to the extension using require.js
Creating HTML and CSS files.
Click the "+" sign in the upper left corner of the screen once again. A window for creating files appears:
Click the "+" sign in the upper left corner of the screen once again. A window for creating files appears:
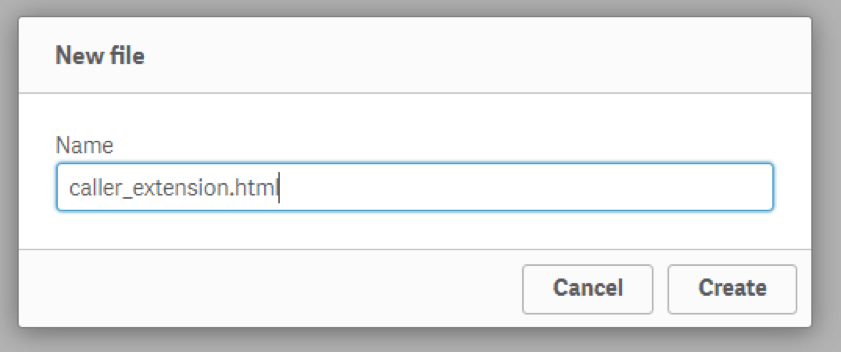
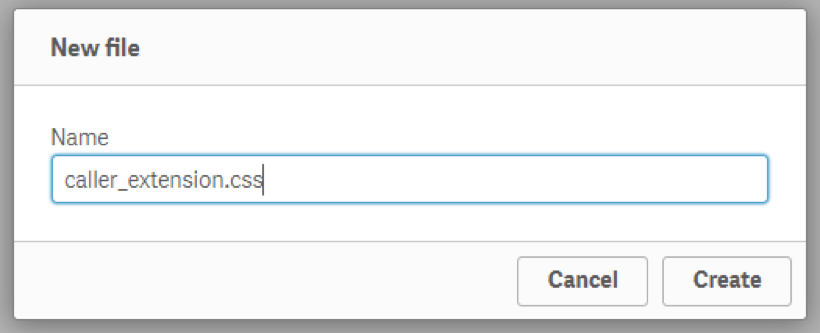
Type there: "caller extension.html" and click "create".
The same steps apply to the CSS file:
As a result, we have the following:
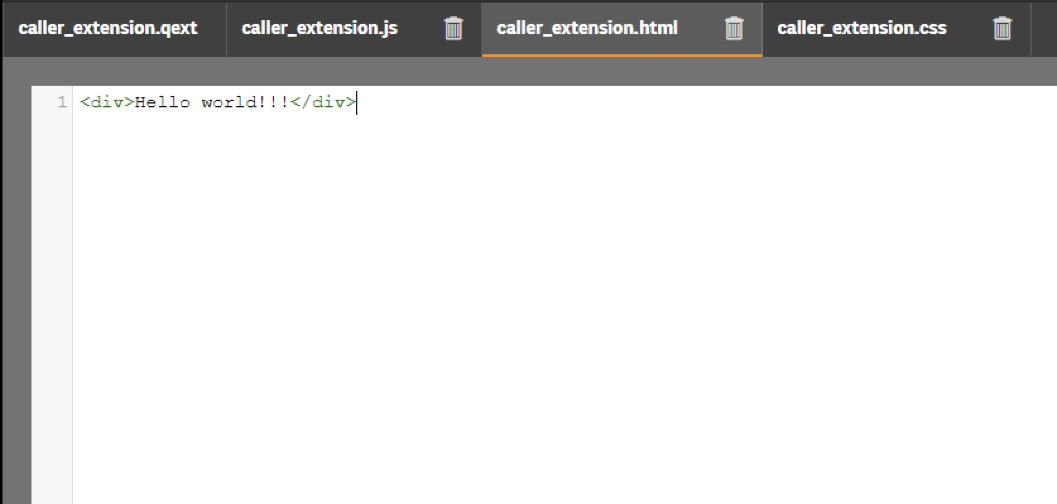
The HTML file is added to the extension.
Now, in order for our extension to recognize this HTML page, we must make the following changes to our JS code:
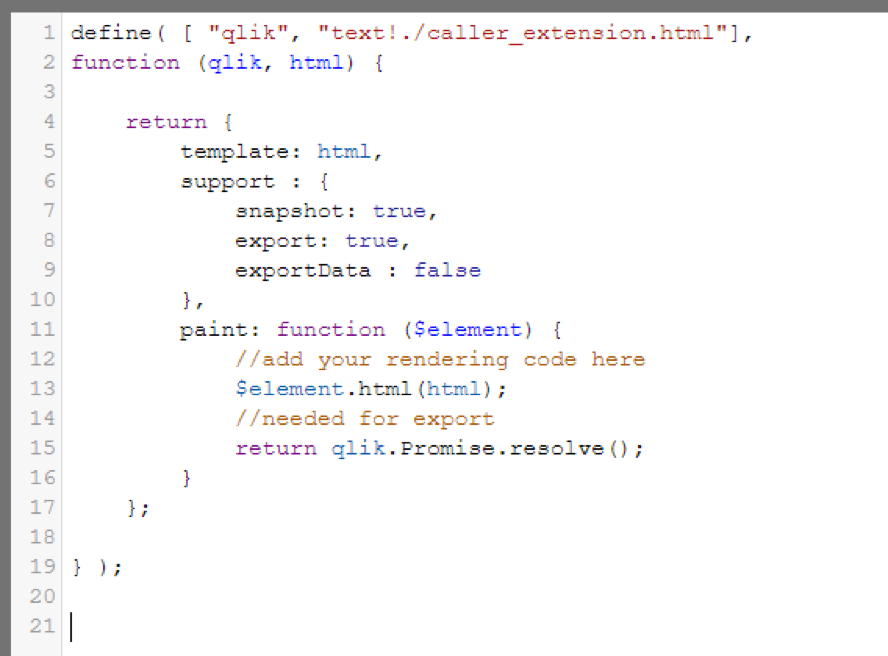
Add the parameter "text!./caller extension.html" to the define function and define it as an html variable:
      define( [ «qlik», «text!./caller_extension.html»],
      function (qlik, html) {...
After that, add the line: "$element.html (html)" to the body of our extension object.
As a result, it looks like this:
Let's now add our extension to the application form:

The extension has been completed.
Incorporating a CSS file into the extension
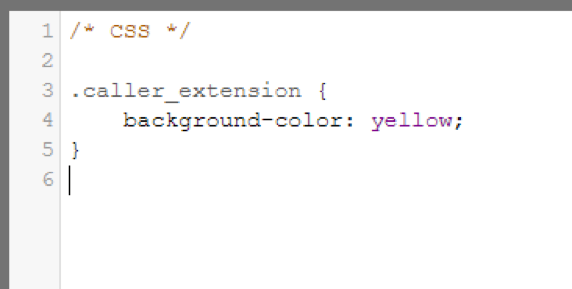
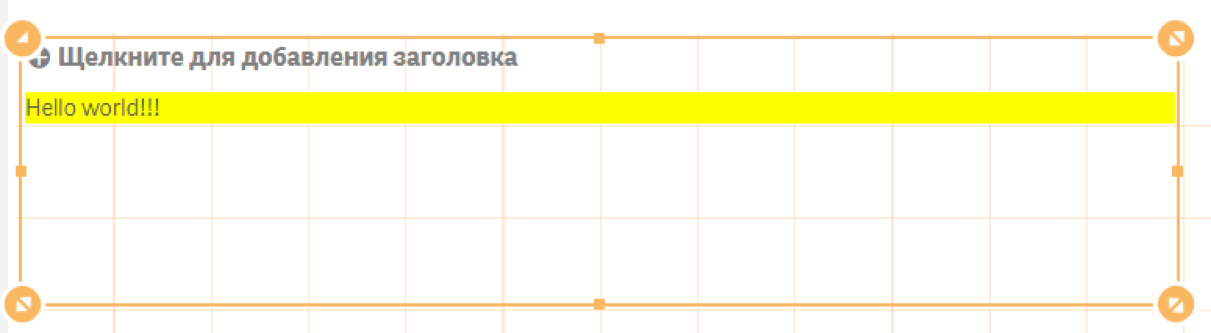
Now we'll do the same thing with the CSS file. We'll make our block yellow for the exam. To do this, add the appropriate background-color property for the class .caller_extension:
Then, in the HTML file, we apply this class to our div-block:
< div class=«caller_extension»>Hello world!!!< /div>
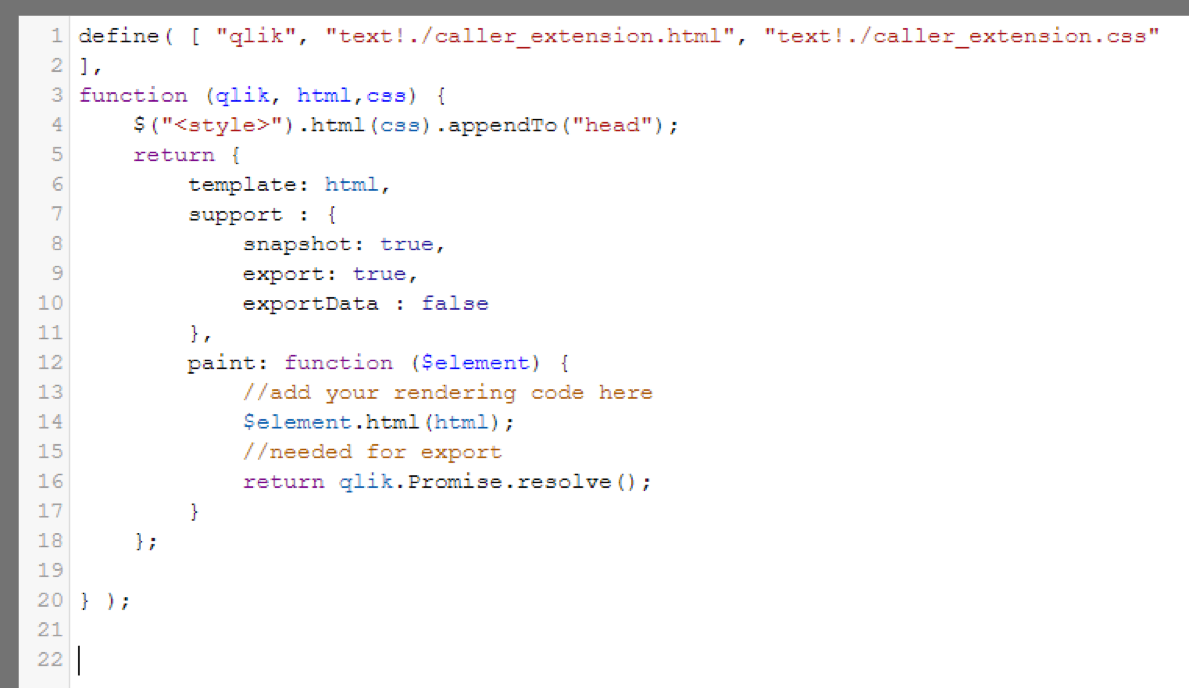
The path to this file is added to the define function parameter, which is then created as a css variable, and this variable is then appended to the head of the page using the tag "< style >":
$(«< style >»).html(css).appendTo(«head»);
Looking at the result:
$(«< style >»).html(css).appendTo(«head»);
Looking at the result:
/BACK
This article will walk you through the process of integrating Qlik Sense with the JsSIP library. This library allows you to make SIP phone calls directly from your browser.
In this section, we'll go through the fundamentals of building an extension from the ground up.
Algorithm of actions:
Extensions are developed through the «dev-hub».
- Creating the extension «caller_extension»
Extensions are developed through the «dev-hub».
To create extensions, go to the top right corner and click the "+" symbol, then pick «Create new extension»:
After clicking, you must input a name for the extension and choose a template from which it will be built:
The following is an example of a simple template, which contains nothing but source files:
Learn more about these files:
The «caller_extension.qext» file
- The file «caller_extension.qext» contains meta data of the extension: name, version, description, etc.
- The file «caller_extension.js» contains the JS code, which is activated by default when an extension is added to the page.
Learn more about these files:
The «caller_extension.qext» file
As previously stated, this file provides our extension's meta data. The name, description, picture, kind of extensions, and version of the click for compatibility can all be specified here.
The «caller_extension.js» file
When the extension is added, the code from this file is automatically put to the page. You may use this file to register the addition of all the essential HTML, CSS, and JS files for our extension.
The library require.js is used for this. We may use it to load a certain file and then write it to a variable. Then, if the variable is HTML or CSS code, we may place it wherever on the page or refer to it as an object (if it is JS).
This method allows you to rule out scenarios when your JS code that uses a certain library starts running before the library was included, resulting in issues.
Adding the necessary project files (HTML, CSS)
Now let's look at the process of creating HTML and CSS files, and then adding them to the extension using require.js
Creating HTML and CSS files.
Click the "+" sign in the upper left corner of the screen once again. A window for creating files appears:
Click the "+" sign in the upper left corner of the screen once again. A window for creating files appears:
Type there: "caller extension.html" and click "create".
The same steps apply to the CSS file:
As a result, we have the following:
The HTML file is added to the extension.
Now, in order for our extension to recognize this HTML page, we must make the following changes to our JS code:
Add the parameter "text!./caller extension.html" to the define function and define it as an html variable:
      define( [ «qlik», «text!./caller_extension.html»],
      function (qlik, html) {...
After that, add the line: "$element.html (html)" to the body of our extension object.
As a result, it looks like this:
Let's now add our extension to the application form:
The extension has been completed.
Incorporating a CSS file into the extension
Now we'll do the same thing with the CSS file. We'll make our block yellow for the exam. To do this, add the appropriate background-color property for the class .caller_extension:
Then, in the HTML file, we apply this class to our div-block:
< div class=«caller_extension»>Hello world!!!< /div>
The path to this file is added to the define function parameter, which is then created as a css variable, and this variable is then appended to the head of the page using the tag "< style >":
$(«< style >»).html(css).appendTo(«head»);
Looking at the result:
$(«< style >»).html(css).appendTo(«head»);
Looking at the result: